|
By accessing or using The Crittenden Automotive Library™/CarsAndRacingStuff.com, you signify your agreement with the Terms of Use on our Legal Information page. Our Privacy Policy is also available there. |

Restoration Tips: Home Made Jigs and Fixtures for Restoring
|
|---|
|
|
Restoration Tips: Home Made Jigs and Fixtures for Restoring
Tom Reese
Antique Automobile
March-April 1972
In performing home restorations much time and effort can be saved by the fabrication of simple jigs and fixtures that not only speed the work, but also result in a better product. One of my favorite simple jigs is a rotary wheel painting set-up that I fashioned out of the rotisserie unit from a discarded barbecue grille.
The problem that I faced was the laying on of uniform coats of primer and enamel on artillery and wire spoked wheels without getting sags and thin spots, and doing it in as few operations as possible.
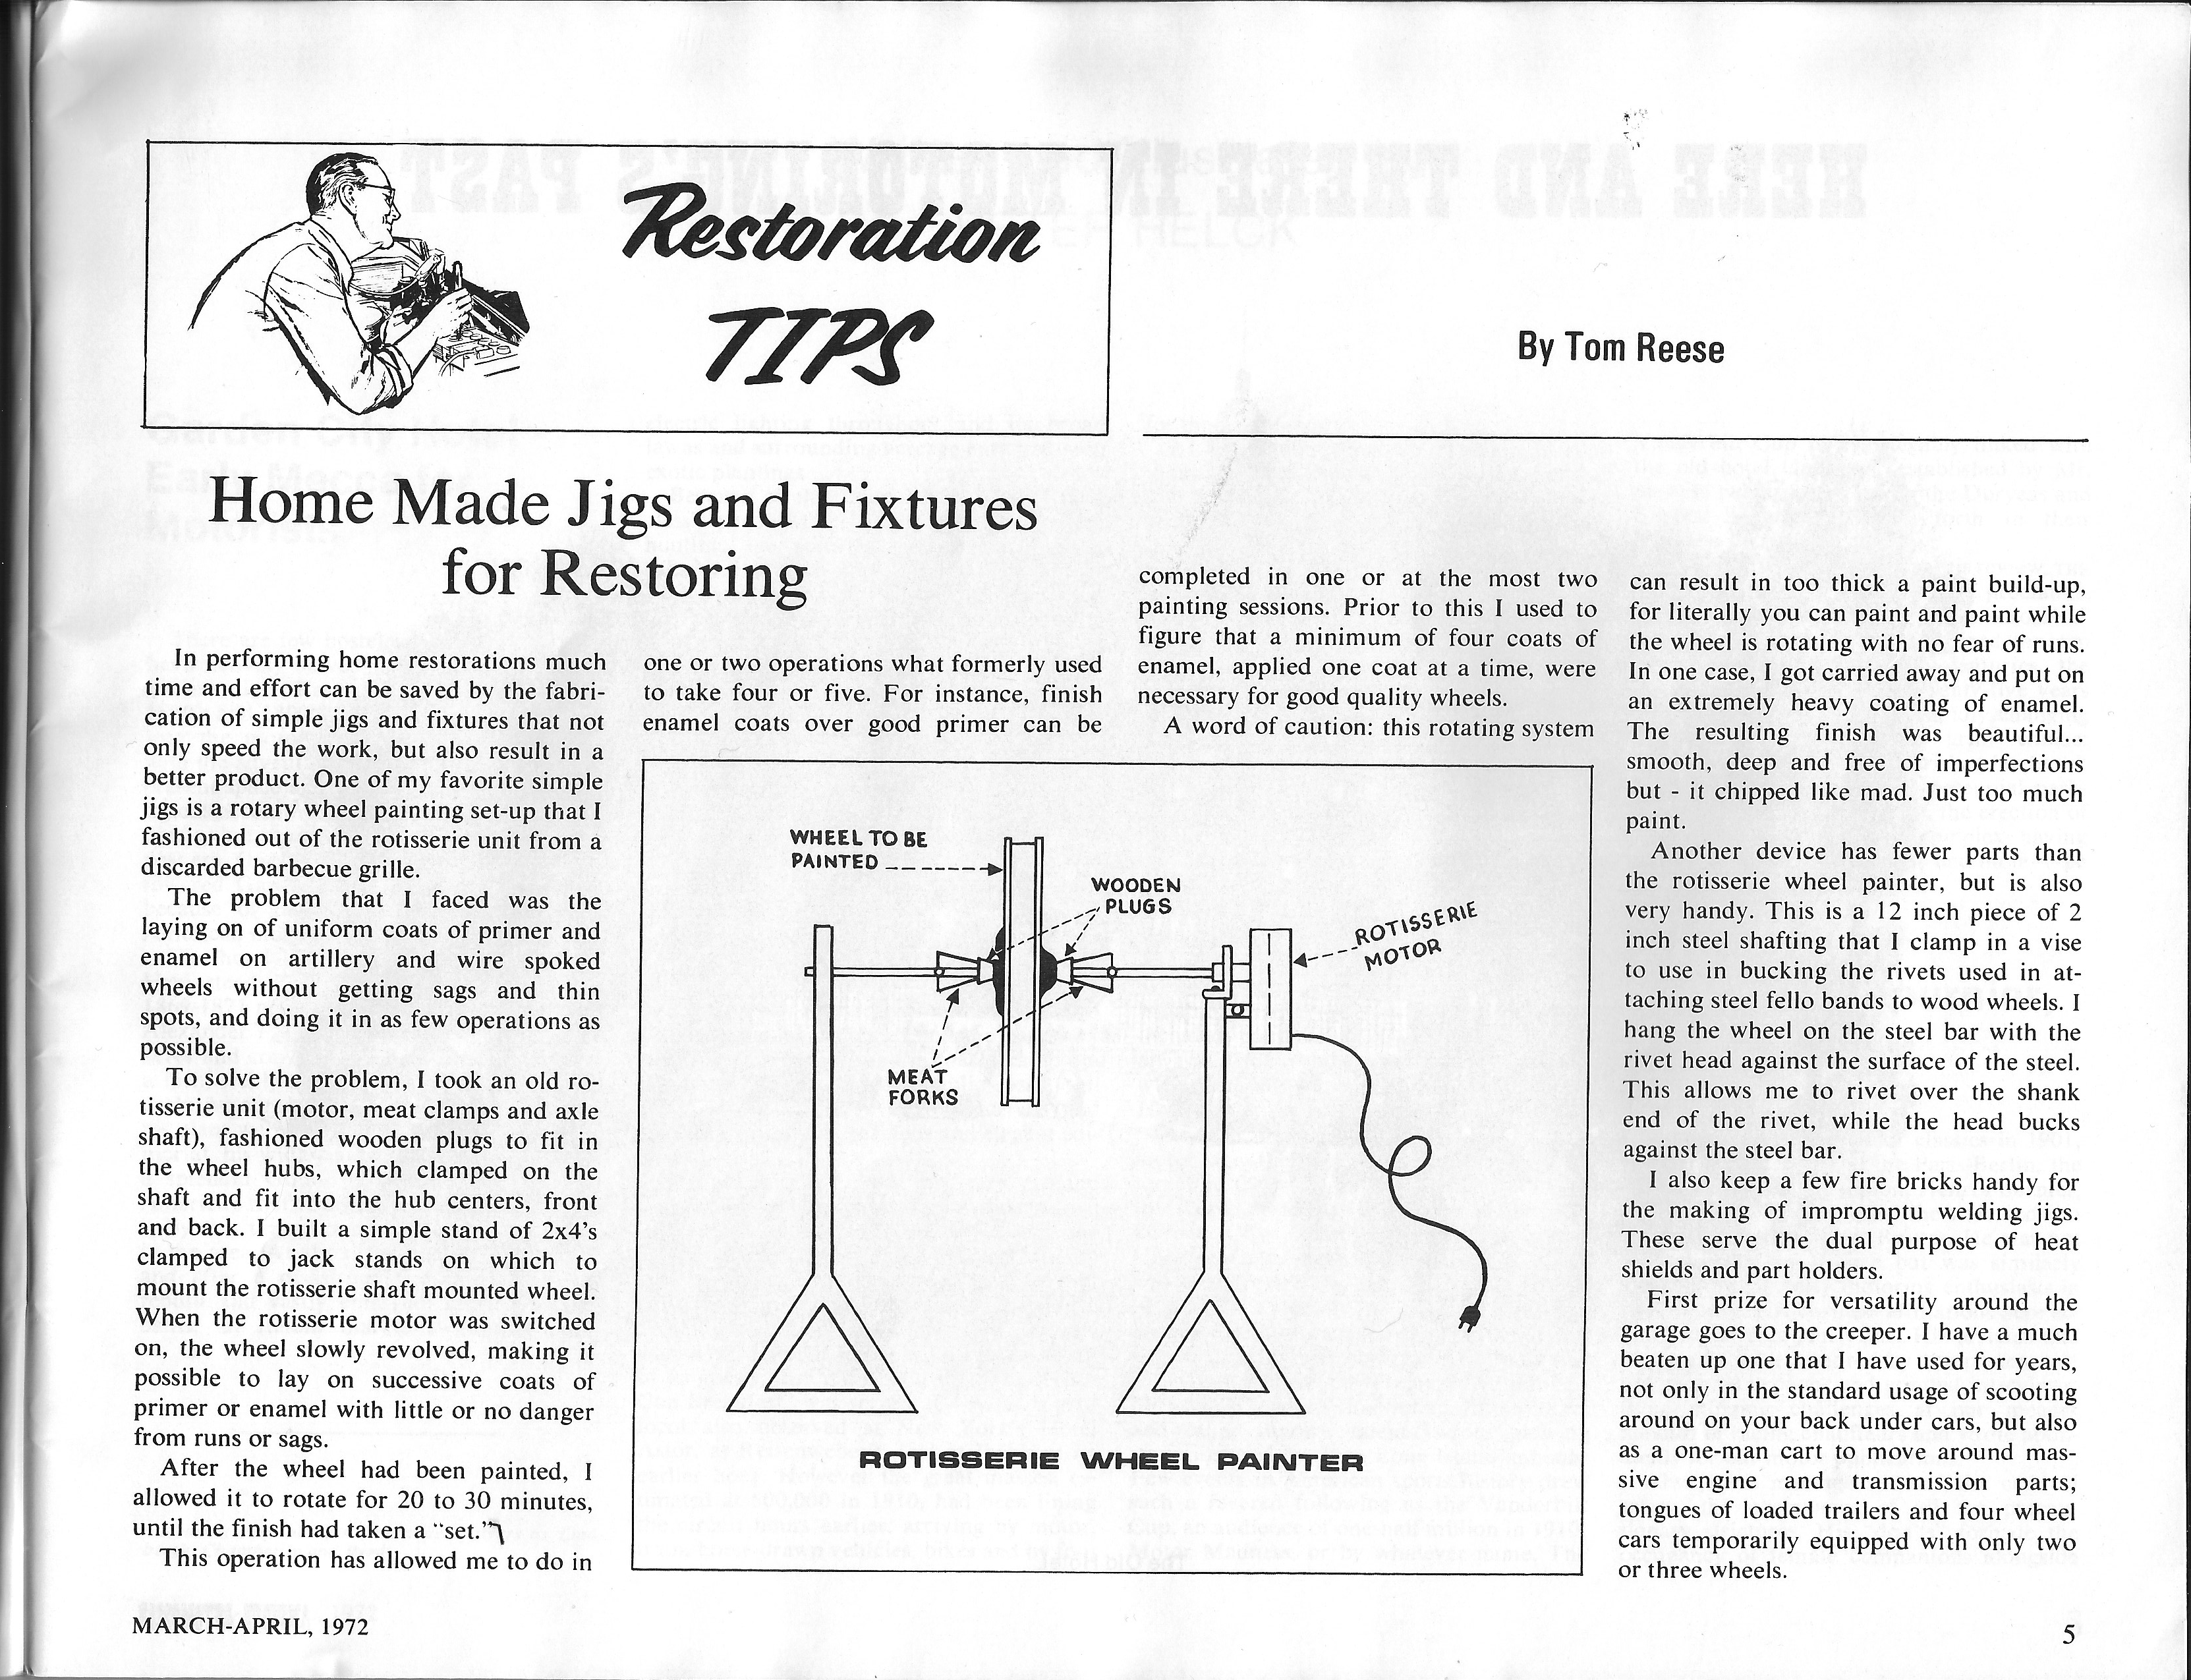
To solve the problem, I took an old rotisserie unit (motor, meat clamps and axle shaft), fashioned wooden plugs to fit in the wheel hubs, which clamped on the shaft and fit into the hub centers, front and back. I built a simple stand of 2x4's clamped to jack stands on which to mount the rotisserie shaft mounted wheel. When the rotisserie motor was switched on, the wheel slowly revolved, making it possible to lay on successive coats of primer or enamel with little or no danger from runs or sags.
After the wheel had been painted, I allowed it to rotate for 20 to 30 minutes, until the finish had taken a "set."
This operation has allowed me to do in one or two operations what formerly used to take four or five. For instance, finish enamel coats over good primer can be completed in one or at the most two painting sessions. Prior to this I used to figure a minimum of four coats of enamel, applied one coat at a time, were necessary for good quality wheels.
A word of caution: this rotating system can result in too thick a paint build-up, for literally you can paint and paint while the wheel is rotating with no fear of runs. In one case, I got carried away and put on an extremely heavy coating of enamel. The resulting finish was beautiful...smooth, deep and free of imperfections but - it chipped like mad. Just too much paint.
Another device has fewer parts than the rotisserie wheel painter, but is also very handy. This is a 12 inch piece of 2 inch steel shafting that I clamp in a vise to use in bucking the rivets used in attaching steel fello bands to wood wheels. I hang the wheel on the steel bar with the river head against the surface of the steel. This allows me to rivet over the shank end of the rivet, while the head bucks against the steel bar.
I also keep a few fire bricks handy for the making of impromptu welding jigs. These serve the dual purpose of heat shields and part holders.
First prize for versatility around the garage goes to the creeper. I have a much beaten up one that I have used for years, not only in the standard usage of scooting around on your back under cars, but also as a one-man cart to move around massive engine and transmission parts; tongues of loaded trailers and four wheel cars temporarily equipped with only two or three wheels.